Written by: Danielle Thurow, Sr. Firmware Engineer
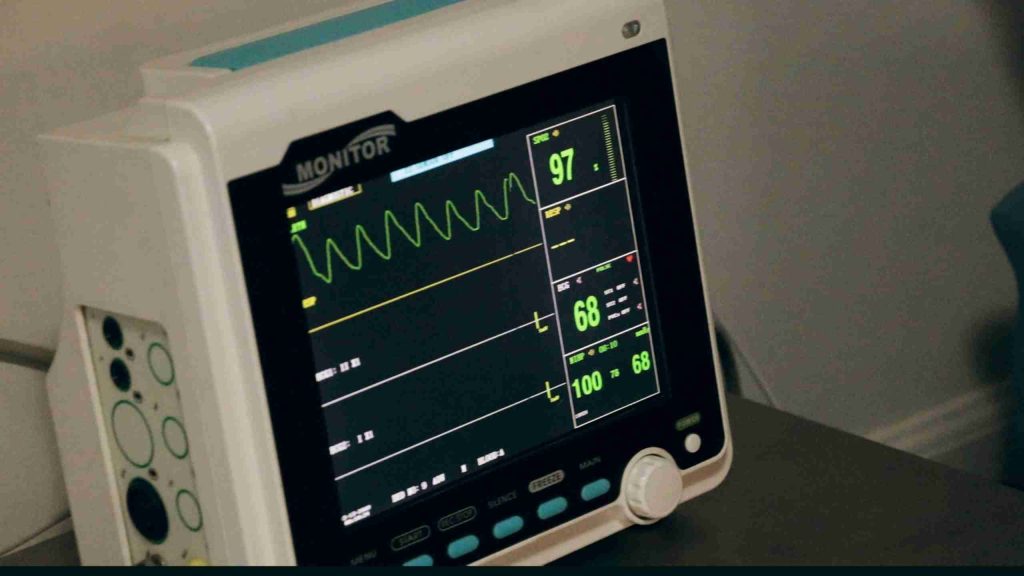
Testing embedded systems is always a difficult issue. Testing on the actual hardware is critical for seeing what the real world product will do, but a lot of times engineers will only have one or two development boards while the hardware is being developed. This makes it difficult for multiple engineers to use especially if they’re working remotely. One way of dealing with this is setting up Hardware In the Loop (HIL) setups. Connecting up to a Raspberry Pi or other shared computer with the actual hardware lets multiple people test with the device, regardless of where they are. Testing with the HIL can also be incorporated into a continuous integration process to make development more robust.
Just connecting development hardware via a programmer or serial cable can only get you so far when testing, though. The issue comes when you want to take measurements with your scope, input a specific waveform, or all those other things you normally would do in person using test equipment. As it turns out, there’s quite a few options to automate or control them via code, without having to break the bank to do it. Let’s dive in.
From the Ground Up
There’s testing-equipment-specific standards, implementations, and protocols all layered on top of each other. To get a clearer view of what you need, we’ll start at the physical layer and work our way up.
Physical Layer
How we physically connect to test equipment has changed over time, resulting in multiple ways to connect depending on the age of the equipment you’re using.
GPIB
GPIB is the most classic and oldest connection still in use. It was created by HP back in the 70s and just hasn’t left. It eventually became the de facto standard, and was then standardized with IEEE 488.1. It was even used in non-test equipment, such as the commodore PET. The downside for this is that the connectors themselves can be very expensive (a new GPIB connector on DigiKey starts at $1000), and GPIB has been slowly phasing out. The standard also expects you to have pretty short cables, which can affect your test setup. There are a number of open source implementations that are cheaper, or you can buy ones on ebay to get around the high initial price. It’s good to know about, but unless your test equipment only has GPIB connections, you’ll probably want to use the other connectors.
USB
USB connectors have gotten pretty popular on a lot of more modern test equipment. Test equipment, not surprisingly, uses a test equipment specific standard, called USB Test and Measurement Class Specification (USBTMC) for driver support. As long as that’s implemented, it makes test equipment very plug and play. And for a HIL setup, if you’re running on a Raspberry Pi or other small computing device, you most likely have quite a few USB connections out of the box, making it easy to set up and test several pieces of equipment at once.
One downside for USB is that, while it has a relatively low failure rate, it does have a larger failure rate than ethernet (mentioned next). So for small setups, USB is great, but if you’re starting to scale up, you may want to look into ethernet.
Ethernet
Ethernet has also gotten pretty popular on modern test equipment. It has a lower failure rate than USB, and naturally allows a lot of test equipment devices to connect together. If you have an option on which physical connections to use, Ethernet is probably your best bet, followed by USB.
Communication Protocols and Standards
Alright, things are plugged in. Are you going to have to talk to each device individually using custom drivers? Thankfully, no. Instead, you’ll get to use:
VISA
VISA stands for “Virtual Instrument Software Architecture”, and is a standard way of talking to testing equipment via the above listed physical communication layers. There are multiple implementations of the VISA standard, but the most popular are National Instruments’s and Keysight’s library implementations. Note that while the VISA specification has explicit bindings to Visual Basic, C, and G (LabVIEW’s graphical language), it doesn’t list other language options. However, a python-only implementation also exists, pyvisa-py, and supports most VISA functionality, but as a bonus, is purely python, so it isn’t as OS-specific as the other libraries.
These libraries let you interface with test equipment with different physical connections.
And how do you interact with one of these libraries? By using:
Pyvisa
Pyvisa is a python front-end that lets you write consistent python code regardless of which VISA library you’re using (NI-VISA, Keysight, or pyvisa-py). This lets you interact with test equipment via python, giving you easy-to-write code and access to all the many other python libraries available out there. So for example, if you want to interact with your test equipment in your pytest tests, you can simply do some imports and it will auto-magically work!
Sending Commands
So you’ve physically connected your devices and can talk to them with VISA. Now what? Well you need to start sending some commands. The commands are all sent as ascii strings and interpreted by the test equipment. The two standards for these commands are:
IEEE 488.2
Remember the GPIB standard, the IEEE 488.1? IEEE followed that up with the 488.2, a set of codes and formats to be used by devices using GPIB. However, that standard was quickly adopted by everyone interacting with test equipment. The standard defines how to send data to a device regardless of underlying physical layer, and includes commands asking about things like device ID, serial number, and other universal commands. They are denoted by an asterisk at the start of the command (e.g. *IDN? when querying for the instrument type and software version).
SCPI
Pronounced “skippy”, SCPI are vendor-defined commands that are less standardized than the IEEE 488.2 commands, though normally commands are standardized across a particular vendor and equipment type. For example, most Keysight oscilloscopes will implement the same SCPI commands for all shared functionality. Otherwise, though, you’ll have to get your particular test equipment’s programming guide from the manufacturer in order to see what commands are supported. These commands are what let you actually control your test equipment by setting input/output, configuring scope setup, and so on. As an example, the Siglent SDS804x, an entry level 4-channel scope, has a programming guide here that lists the supported SCPI and 488.2 commands.
SCPI commands are normally shown as mixed case (e.g. the :PRINt? Command for the SDS804x). The lower case letters are optional. If a command has a question mark at the end, it’s considered a query, so the command returns info of some sort (so the :PRINt? Command returns the screenshot file). For more info, check out the programming guide linked above, or dive even deeper and read the SCPI standard put out by the IVI foundation.
Example
Putting all this info together, let’s look through an example of taking a screenshot of a scope’s screen during a test. We’ll use the USBTMC connection on the scope, use pyvisa with the pyvisa-py backend, and use the scope’s programming guide to determine which SCPI commands to send. Look at that, you can now understand what that sentence means!
Overview
Hardware needed: Siglent SDS804x HD connected via a USB-A to USB-B cable. A Mac, Windows, or Linux computer to connect to.
NOTE: many scopes have this functionality, so you don’t have to use this particular scope, but if you use a different one, you’ll have to check your programming guide to find out the SCPI command to take the screenshot.
Software: Pyvisa, pyvisa-py, and pytest
Setting up Python
To keep things self-contained, you can use poetry to control the python environment. Poetry is a dependency management and package tool for python. It has a nice interface to python virtual environments, keeping dependencies in their own sandbox. It also has some good dependency resolution, making it easy to work with. Here’s the pyproject.toml file I used:
[project]
name = "pyvisa-test"
version = "0.1.0"
description = ""
authors = [
	{name = "Danielle Thurow",email = "danielle.thurow@dojofive.com"}
]
readme = "README.md"
requires-python = ">=3.11,<4.0"
dependencies = [
	"pyvisa (>=1.15.0,<2.0.0)",
	"pyvisa-py (>=0.8.0,<0.9.0)",
	"pyusb (>=1.3.1,<2.0.0)",
	"pyserial (>=3.5,<4.0)",
	"psutil (>=7.0.0,<8.0.0)",
	"zeroconf (>=0.146.5,<0.147.0)",
	"pytest (>=8.3.5,<9.0.0)"
]

[build-system]
requires = ["poetry-core>=2.0.0,<3.0.0"]
build-backend = "poetry.core.masonry.api"

[tool.poetry]
package-mode = false
Otherwise, you can use pip to install: pyvisa, pyvisa-py, pyusb, pytest yourself. Depending on what connection you have with your test equipment, you’ll also want to install pyusb, psutil and zeroconf. Note also that you don’t have to use pytest, you can just directly write scripts with pyvisa and pyvisa-py.
To verify it’s installed correctly, you can run the pyvisa-info command that’s bundled with pyvisa, and see what connection types are available. Below is an example output from my machine. Note I did install the NI-VISA library as well, so that shows up under the /Library/Frameworks/visa.framework/visa section below.
> poetry run pyvisa-info
Machine Details:
   Platform ID:	macOS-15.4.1-x86_64-i386-64bit
   Processor:  	i386

Python:
   Implementation: CPython
   Executable: 	/Users/daniellethurow/Library/Caches/pypoetry/virtualenvs/pyvisa-test-kCBfrbbG-py3.11/bin/python
   Version:    	3.11.11
   Compiler:   	Clang 16.0.0 (clang-1600.0.26.6)
   Architecture:   ('x86', 64)
   Build:      	Jan 28 2025 11:59:23 (#main)
   Unicode:    	UCS4

PyVISA Version: 1.15.0

Backends:
   ivi:
  	Version: 1.15.0 (bundled with PyVISA)
  	#1: /Library/Frameworks/visa.framework/visa:
     	found by: auto
     	architecture:
     	Vendor: National Instruments
     	Impl. Version: 24118528
     	Spec. Version: 7340032
   py:
  	Version: 0.8.0
  	ASRL INSTR: Available via PySerial (3.5)
  	USB INSTR: Available via PyUSB (1.3.1). Backend: libusb1
  	USB RAW: Available via PyUSB (1.3.1). Backend: libusb1
  	TCPIP INSTR: Available
     	Resource discovery:
     	- VXI-11: ok
     	- hislip: ok
  	TCPIP SOCKET: Available
  	PRLGX_TCPIP INTFC: Available
  	PRLGX_ASRL INTFC: Available via PySerial (3.5)
  	GPIB INSTR: Available
  	VICP INSTR:
     	Please install PyVICP to use this resource type.
  	GPIB INTFC:
     	Please install linux-gpib (Linux) or gpib-ctypes (Windows, Linux) to use this resource type. Note that installing gpib-ctypes will give you access to a broader range of functionalities.
     	No module named 'gpib'
How to get your device ID string
To get pyvisa to connect to your scope, you need to give it the unique device string that identifies it. The most straightforward way is to use pyvisa to list available resources. You can then unplug/plug in your device to see which string it is. Below is an example on my machine with the scope unplugged and then plugged in:
> poetry run python3
Python 3.11.11 (main, Jan 28 2025, 11:59:23) [Clang 16.0.0 (clang-1600.0.26.6)] on darwin
Type "help", "copyright", "credits" or "license" for more information.
>>> import pyvisa
>>> rm = pyvisa.ResourceManager()
>>> print(rm.list_resources())
('ASRL1::INSTR', 'ASRL2::INSTR')
>>> print(rm.list_resources())
('ASRL1::INSTR', 'ASRL2::INSTR', 'USB0::0xF4EC::0x1017::SDS08A0D812697::INSTR')
>>>
This shows that my scope’s at ‘USB0::0xF4EC::0x1017::SDS08A0D812697::INSTR’
Running a test
Now that I know what device string I have, and I have my programming guide, I can write up a simple pytest script to take a screenshot of my scope’s screen and save it in a file called “screenshot.bmp”. Here’s the test_example.py file:
import pyvisa
import os


def test_scope_screenshot():


   try:
       rm = pyvisa.ResourceManager('@py')


       my_file_name = './screenshot.bmp'
       print(my_file_name)
       my_file = open(my_file_name, 'wb')


       # TODO: replace string with your instrument string
       inst = rm.open_resource('USB0::62700::4119::SDS08A0D812697::0::INSTR')
       print("opened")


       # print the screen as a bmp file
       # TODO: replace below SCPI command with one supported by your scope
       inst.write("PRIN? BMP")
       print("sent")
       result_str = inst.read_raw()
       # get all chunks of data and send it into my file
       while (len(result_str) == inst.chunk_size):
           my_file.write(result_str)
           my_file.flush()
           result_str = inst.read_raw()


       # output the last chunk that's < chunk_size
       my_file.write(result_str)
       my_file.flush()
       my_file.close()
   except Exception as err:
       print('Exception: ' + str(err))
       assert(False)
I can then run this by running poetry run pytest (or just pytest if you’re not using poetry) and I get the below image as screenshot.bmp.
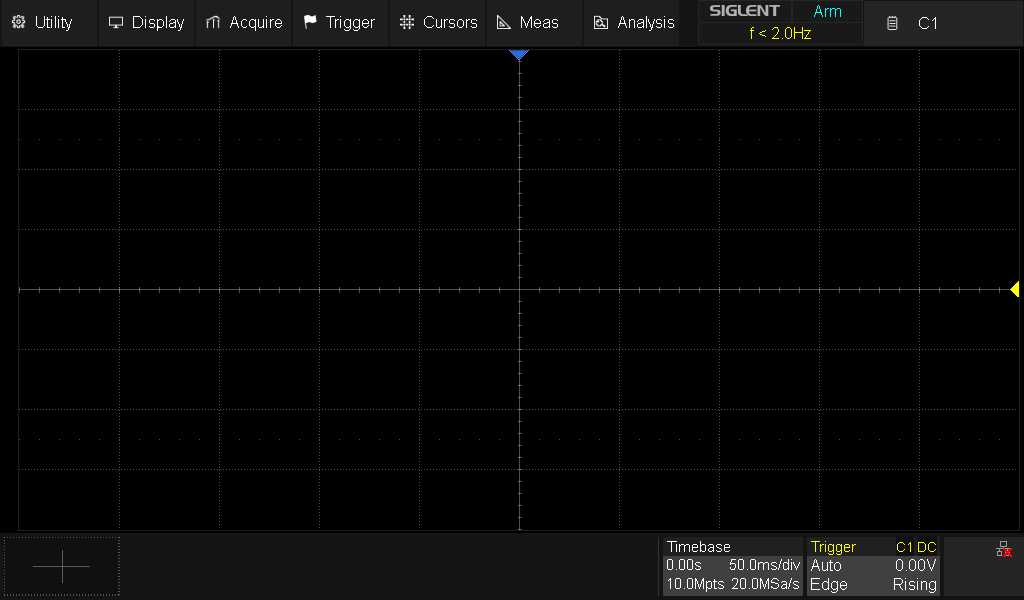
This isn’t a very helpful screenshot right now, since my scope isn’t measuring anything. However, if I decided to connect up a channel to a device outputting a waveform, it’s much more useful. Below I’m measuring the output of the P0.28 pin on a nrf5340 dev kit, which I’m using to flash an LED on and off.
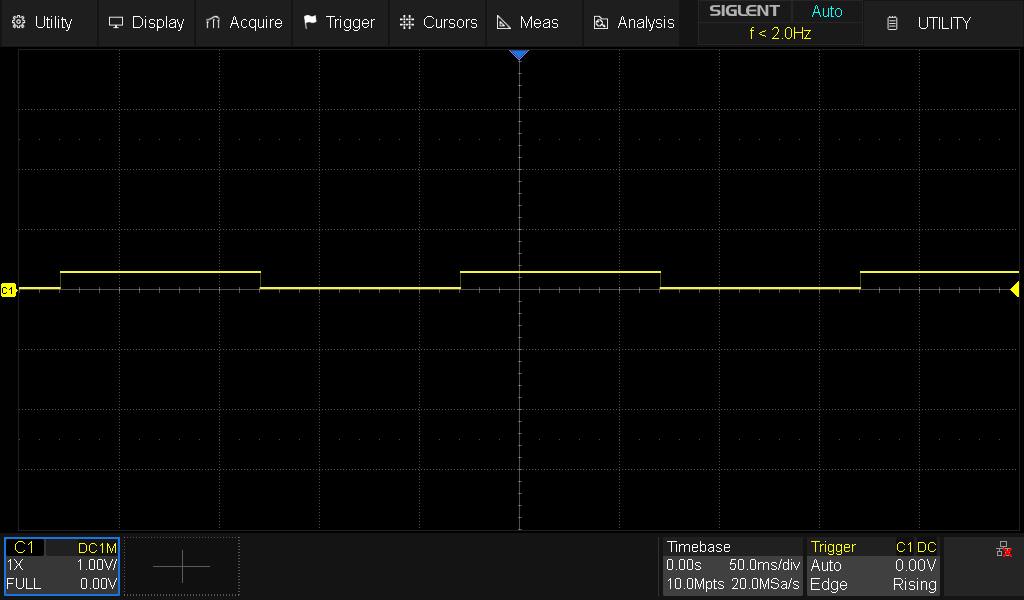
This gives an actually useful use case: If you have a device-under-test (DUT) that has a waveform that’s not necessarily easy to test automatically (say there’s a range of acceptable waveforms), then taking a screenshot during a test and storing it to look at later could be helpful!
Going Further
Now that you have an initial setup and understanding of test equipment automation, there’s a lot of areas you can dive into. You’ll be able to interact with scopes, DMMs, signal generators, power supplies, and more, all using the same interface, just with different SCPI commands.
Ready to Level Up Your Firmware Team?
The embedded world is changing, and the gap between those who adopt CI/CD and those who don’t is growing. If you are ready to streamline your firmware workflow, accelerate delivery, and reduce risk, we’re here to help. Book a call with Dojo Five to get the conversation started! Or, to start increasing your team’s productivity by using EmbedOps, our free DevOps and CI/CD platform for Device Teams.
References:
GPIB: https://helpfiles.keysight.com/csg/e5080a/programming/learning_about_gpib/gp-ib_fundamentals.htm
SCPI protocol: https://www.ivifoundation.org/About-IVI/scpi.html
Pyvisa docs: https://pyvisa.readthedocs.io/en/latest/
Pyvisa repo: https://github.com/pyvisa/pyvisa
Pytest getting started: https://docs.pytest.org/en/stable/getting-started.html#get-started
Example repos using pyvisa
Other ways of taking screenshots with pyvisa, for Rigol scopes: https://github.com/rdpoor/grab-o-scope/tree/main
github repo for controlling power supply with SCPI: https://github.com/circuit-specialists/PowerSupply_ElectronicLoad_Control