It is no secret that commercial embedded and IoT systems must operate reliably in the field for years without intervention. For starters, operational failures can amount to costly product recalls, downtime, security risks, and loss of trust from customers, all of which negatively impact future business opportunities. Comprehensive testing and validation are therefore vital before sending devices out into the world, but this can be more challenging than it seems.
Part 1 of this series introduced the common testing frameworks that embedded engineers are encouraged to use, with unit tests at the center of the discussion for improving system reliability. However, despite their ability to catch logic errors early, unit tests don’t ensure hardware-software interactions behave as intended in real-world environments. Due to their granularity, they also don’t test the interactions between different parts of the firmware and, therefore, the system as a whole.
Consider the following scenarios that may only become apparent once fleets of Bluetooth-enabled devices are already deployed:
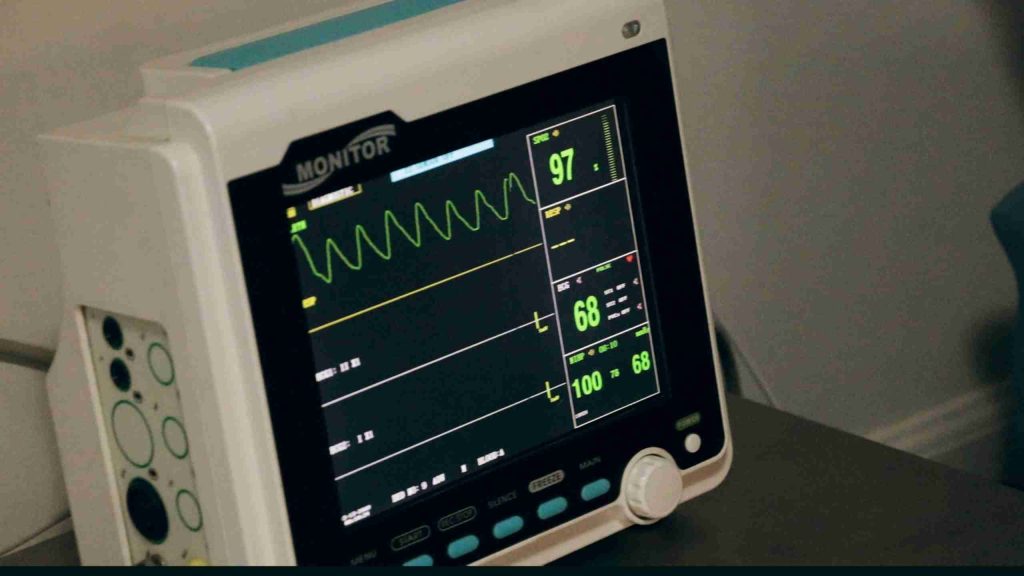
- Example 1: When enabling Bluetooth Low Energy (BLE) scanning in an environment with more than fifty other devices advertising, the controller crashes after sending a string of host controller interface (HCI) events via USB. The impact is that the device becomes unresponsive to external commands, making it useless.
- Example 2: Due to a glitch in the cloud, multiple simultaneous over-the-air (OTA) firmware update start commands are sent to a fleet of BLE-enabled industrial devices. What should have been a routine OTA firmware update fails because the devices expect only a single OTA start command at a time. This error leads every unit to become permanently bricked in the field.
In both these cases unit testing would not have been able to predict these errors. This is where developers benefit from hardware-in-the-loop (HIL) testing, which connects target hardware to a real-time simulator so that firmware and higher-level software can be tested and validated in a more application-accurate scenario before deployment.
The Advantages and Challenges of HIL Testing
HIL testing closes many of the performance verification gaps presented by unit testing alone. As well as running on actual hardware, these tests validate physical I/O, real-time behavior, and OTA update reliability, enabling development teams to catch bugs that are invisible to software-only simulations. Such bugs include race conditions, peripheral conflicts, and BLE packet loss.
HIL tests are particularly useful for stress testing functions essential to IoT deployments: direct firmware updates (DFUs); power management and low-power modes; peripheral drivers for UART, I²C, SPI, and BLE; and end-to-end scenarios with real sensors and connectivity can all be verified through HIL testing.
Nevertheless, HIL testing is not always popular among embedded and IoT development teams. This is mainly due to its practical challenges:
- Cost and scalability: HIL tests can be expensive and difficult to scale due to the hardware resources required; this is predominantly the real-time simulators at the heart of each testing bench.
- Complex setup: Setting up and maintaining testing harnesses and devices under test (DUTs) can be very complex when building accurate test scenarios. This is further complicated when harnesses require frequent manual resets, which can be both tedious and time-consuming.
- Limited framework usability: Due to their specificity, HIL tests offer few reusable frameworks, and these can still produce results that are inconsistent across different testing benches.
Understandably, HIL testing can often feel like a non-essential hurdle for embedded teams pushed by limited resources and tight market deadlines. However, the previous stories of dead devices in the field speak for themselves, so developers simply need an easier way to perform HIL tests as part of their standard workflow.
HIL Testing with EmbedOps
As with the unit testing examples shown in part 1, Dojo Five EmbedOps significantly lowers the barrier for embedded teams to adopt HIL testing. With automation, CI integration, and reusable templates, this DevOps platform makes HIL testing practical, allowing developers to focus on writing tests—not building and maintaining test rigs.
To ease the process of HIL testing, EmbedOps presents development teams with CLI scaffolding that creates scalable pytest-based test harnesses, as well as CI configs and reproducible, containerized environments for conducting isolated HIL tests. These harnesses include common functions like automated device reset, flashing, and reporting.
Additionally, EmbedOps offers a standardized harness architecture with reusable templates that are supported by an off-the-shelf gateway kit compatible with popular devices like the Nordic nRF series. This and EmbedOps’ ability to support new or custom protocols to interact with the DUT, as well as its support of common testing frameworks that developers might already have used, makes HIL testing a streamlined process that embedded teams can roll out without the usual pain points.
To illustrate its ease of use, the following demo uses EmbedOps to test a BLE DFU for a Nordic nRF54 development kit running Zephyr RTOS. The aim of this HIL test is to ensure the DFU works reliably across OTA sessions so that devices in the field can receive it without issue. This test also requires a Raspberry Pi 4 to serve as a HIL gateway.
Creating a project and applying the HIL template
The first step is to set up the test in the EmbedOps project repo. For those who have not yet used EmbedOps, follow the EmbedOps CLI Quickstart tutorial to sign up for an account, install the related dependencies and EmbedOps CLI, and log in.
Once this is done, create a new directory for the nRF54 HIL Quickstart project and connect it to the EmbedOps platform. Running the following commands in the host environment will create an initial dev container and CI setup:
mkdir nrf54-hil-quickstart
cd nrf54-hil-quickstart
git init
eo init
Users will then be prompted to select their preferred CI provider and Linux distribution; for this demo, these are set to GitHub and Ubuntu respectively. EmbedOps will then generate the following:
- .embedops/repo_id.yml file that will connect this repository to the EmbedOps platform
- .embedops/template-settings.yml file that saves the CI and Linux distribution settings
- .github/workflows/init.yml file and a /ci folder
The quickstart template can then be added using an eo add command. For this HIL test example, the nRF54L15 HIL Quickstart template:
- Uses v3.1.1 of the nRF Connect SDK
- Imports only the necessary modules to minimize the time it takes to initialize the dev container
- Configures ccache to store the cache in the root of the project for caching locally and exporting the cache in CI
- Uses Zephyr’s T2 topology
On the host machine, run the eo add nrf54l15-hil-quickstart command to apply this template. This will create a large set of files in the repository, including:
nrf54-hil-quickstart/
├── .devcontainer
│   ├── devcontainer.json
│   └── Dockerfile
├── .embedops
│   ├── hil
│   │   └── config.yml
│   ├── repo_id.yml
│   └── template-settings.yml
├── .github
│   └── workflows
│       ├── init.yml
│       └── zephyr-build-and-hil.yml
├── .gitignore
├── app
│   ├── CMakeLists.txt
│   ├── CMakePresets.json
│   ├── prj.conf
│   ├── src
│   │   └── ...
│   ├── sysbuild
│   │   └── mcuboot.conf
│   ├── sysbuild.conf
│   └── VERSION
├── ci
│   ├── hil.sh
│   ├── pipeline.json
│   ├── pipeline.sh
│   └── zephyr.sh
├── hil
│   ├── app_downgrade_0_1.bin
│   ├── conftest.py
│   ├── hil_sdk
│   │   └── ...
│   ├── README D5 HIL Kit.md
│   └── test_demo_app.py
├── init-west-workspace.sh
├── README.md
└── west.yml
The most important of these is the configuration file .embedops/hil/config.yml, which will initially contain the following:
hil_root: hil
hil_extras:
  - name: build/merged.hex
This YAML file configures the HIL setup for the project, specifying which directory contains the HIL test and which extra files to include. To test a DFU, .embedops/hil/config.yml will need to be modified to include the update file, resulting in:
hil_root: hil
hil_extras:
  - name: build/merged.hex
  - name: hil/nrf54k_firmupdate.bin
nrf54k_firmupdate.bin contains the new firmware version and is generated by re-building the firmware after bumping the version up from 0.0.1 (the original version) to 0.0.2. For this demo, the file contains a Zephyr application that advertises a firmware version service that reports a device’s current running firmware version over Bluetooth, using a custom-defined BLE service. It also periodically blinks an LED on the dev kit to show that it is operational.
In addition to .embedops/hil/config.yml:
- conftest.py implements test fixtures for the various interfaces, providing the definition of the tests and the context in which they are carried out.
- test_demo_app.py contains multiple tests for all demo app features.
More information on pytest fixtures and how to use them can be found in the pytest documentation.
For this DFU workload, the update cycle uses MCUboot secure bootloader through Zephyr’s default Nordic partitioning; the update build itself is done without MCUboot as the original flashed image contains it. conftest.py and test_demo_app.py must also be modified to contain the code necessary for implementing the desired HIL test:
conftest.py

# Tests are executed with pytest
import pytest
import time
import subprocess
import logging
import os

# asyncio is used to handle bluetooth interactions
# This plugin makes testing with asyncio easier
import pytest_asyncio

# Import EmbedOps provided sdk features
from hil_sdk.interfaces.ble.ble_client import BLEClient
from hil_sdk.interfaces.ble.nordic.ble_shell_service import BLEShellService
from hil_sdk.interfaces.ble.nordic.ble_nus_service import BLENUSService
from hil_sdk.interfaces.ble.nordic.ble_dfu_service import BLEDFUService
from hil_sdk.interfaces.ble.ble_scanner import BLEScanner
from hil_sdk.interfaces.nrfutil_interface import nrfutil_program, nrfutil_reset

BLE_ADDR_STR_LEN = 18  # Length of a BLE address string (including newline)

# Run flash fixture one time at session start
@pytest.fixture(autouse=True, scope="session")
def flash_fixture(hil_extras_get_path):

    logging.info("Flashing target...")
    assert nrfutil_program(hil_extras_get_path("build/merged.hex")) == 0

    logging.info("Resetting target...")
    assert nrfutil_reset() == 0

    time.sleep(2)  # Sleep for a couple of seconds to let the target device start up


@pytest.fixture(scope="function", autouse=True)
def btmon_fixture(request, hil_results_open):

    btmon_out = hil_results_open("btmon.log", "w")

    p = subprocess.Popen(["btmon"], stdout=btmon_out, stderr=btmon_out)

    yield

    p.terminate()
    btmon_out.close()


@pytest_asyncio.fixture
async def ble_client_fixture():

    def filter_function(advertising_device):
        return advertising_device.name == "EmbedOps DFU Demo Device"

    devices = await BLEScanner.find_devices(filter=filter_function)
    assert len(devices) == 1  # Only expect a single device with the given address

    device = devices[0]

    logging.info(f"Connecting to {device.name} ({device.address})...")

    client = BLEClient(device.address)
    connect_status = await client.connect()
    assert connect_status == True

    connected = await client.is_connected()
    assert connected == True

    logging.info(f"Connected to {device.name} ({device.address})!")

    yield client

    await client.disconnect()

    logging.info("Disconnected!")


@pytest.fixture
def ble_shell_fixture(ble_client_fixture):

    return BLEShellService(ble_client_fixture)

@pytest.fixture
def ble_nus_fixture(ble_client_fixture):

    return BLENUSService(ble_client_fixture)

@pytest.fixture
def ble_dfu_fixture(ble_client_fixture):

    return BLEDFUService(ble_client_fixture)


test_demo_app.py

import os
import time
import asyncio
import pytest
from collections import namedtuple

from hil_sdk.interfaces.ble.ble_scanner import BLEScanner
from hil_sdk.interfaces.ble.ble_client import BLEClient
from hil_sdk.interfaces.ble.nordic.ble_dfu_service import BLEDFUService
from hil_sdk.interfaces.nrfutil_interface import nrfutil_reset

CURRENT_VERSION = "0.0.1+0"
NEW_VERSION = "0.0.2+0"

async def wait_for_advertising_device(device_address: str, timeout: int) -> bool:

    """Wait for a device with the given name to appear in a device scan.
    Returns true if the device appeared, or false if the search timed out."""

    total_scan_time = 0

    while total_scan_time < timeout:

        def filter_function(advertising_device):
            return advertising_device.address == device_address

        start_time = time.monotonic()
        devices = await BLEScanner.find_devices(filter=filter_function)

        if len(devices) > 0:
            return True

        total_scan_time += int(time.monotonic() - start_time)
        print(f"Scanned for {round(total_scan_time, 2)} total seconds, {device_address} not found...")

    return False


@pytest.mark.asyncio
async def test_ble_dfu(ble_client_fixture, hil_extras_get_path):
    dfu_service = BLEDFUService(ble_client_fixture)

    # First, verify that the correct firmware version has loaded
    dis_fw_version_uuid = "00002A26-0000-1000-8000-00805F9B34FB"
    initial_firm_version = await ble_client_fixture.read_gatt(dis_fw_version_uuid)
    assert CURRENT_VERSION == initial_firm_version.decode('utf-8')
    # This ought to be version 0.0.1
    print(f"DIS Service is reporting v{initial_firm_version.decode('utf-8')} for the active firmware version")

    # Print starting partition state
    image_states = await dfu_service.get_state_of_images(verbose=True)

    # Specify upgrade file
    test_image =  hil_extras_get_path("nrf54k_firmupdate.bin")

    # Next, perform DFU to the new version of the software
    # app_update.bin is a part of this test and is a newer version
    # 0.0.2
    current_progress = 0
    def update_callback(offset, total_size):

        nonlocal current_progress

        percent = (100 * offset) // total_size

        if percent >= current_progress:
            print(f"DFU Progress: {percent}%")
            current_progress += 5

    # Perform DFU
    dfu_status = await dfu_service.image_upload(test_image, on_update=update_callback)
    assert dfu_status == True

    # Print partition state
    image_states = await dfu_service.get_state_of_images(verbose=True)

    # Set the state of the image's confirmation to "False" which marks it for temporary execution
    print("Setting DFU image to pending (temporary execution)")
    dfu_hash = image_states["images"][1]["hash"]
    await dfu_service.set_state_of_image(dfu_hash, False)

    # Reset, which will cause the nRF to load the newly DFU'd firmware in test mode
    await ble_client_fixture.disconnect()
    print("Resetting target after DFU...")
    assert nrfutil_reset() == 0

    print("Sleeping for 10 seconds for update to be applied...")
    await asyncio.sleep(10)

    # Wait for the nRF to copy the image between flash banks
    device_found = await wait_for_advertising_device(ble_client_fixture.address, 60)
    assert device_found

    # Since the target has been offline for an extended amount of time (over 30 seconds),
    # it has disappeared from the BlueZ stack's device list. Therefore the Bleak backend
    # requires the creation of a new client object.
    new_client = BLEClient(ble_client_fixture.address)
    await new_client.connect()
    dfu_service = BLEDFUService(new_client)
    dis_fw_version = await new_client.read_gatt(dis_fw_version_uuid)
    assert dis_fw_version.decode('utf-8') == NEW_VERSION
    print(f"DIS Service is reporting v{dis_fw_version.decode('utf-8')} for the active firmware version")

    # Print partition state information
    image_states = await dfu_service.get_state_of_images(verbose=True)

    await new_client.disconnect()
Within test_demo_app.py, the HIL test test_ble_dfu uses the EmbedOps HIL SDK’s provided DFU fixture and connects to the board, via Bluetooth, with the name “EmbedOps DFU Demo Device.” It then reads a given UUID of the Bluetooth GATT characteristic that has the version information for the currently running firmware.
The test assumes the firmware version running on the board is version “0.0.1” and asserts this. If this is not the case, the test fails. After the test verifies that the board is running the correct version of the firmware, it initiates a DFU update over the Bluetooth connection it made. It then waits for the board to reboot, which ensures MCUboot installs the update.
After the wait time has elapsed, the test initiates another connection with the board to read the advertised firmware version. It then asserts whether what it has read is the expected firmware version, “0.0.2.” At this point the test ends, having reported whether the DFU was successful or not.
Provisioning a device and building the project in a dev container
Next, provision a new HIL device on the EmbedOps platform by running the eo hil provision command on the host in the root of the repository. The gateway image can take around 5 minutes to download.
When successful, EmbedOps will generate a gateway-image.img file. Using a tool such as Balena Etcher or Raspberry Pi Imager, burn this file onto an SD card and insert it into the Raspberry Pi, then connect the Raspberry Pi to power and Ethernet, and to the nRF54 dev kit via USB.
The Raspberry Pi can now be powered on so the EmbedOps platform can communicate with the gateway and DUT for HIL testing. The boot should take around 10 minutes to complete, and this provision and flash process can be repeated to add several devices to a shared fleet.Correctly provisioned devices will appear on the HIL Fleet page of the EmbedOps platform. Alternatively, running eo hil fleet on the host should return an output similar to the following:
| Name | Source | Location | Status |
|---|---|---|---|
| D-1 | Trial Project | project | OFFLINE |
| D-2 | Trial Project | project | AVAILABLE |
| D-3 | Trial Project | project | AVAILABLE |
where D-1, D-2, and D-3 are three devices within the fleet. If devices remain unavailable or offline, verify the internet connection to the Raspberry Pi, accounting for latency between reconnections and status updates.
The project can now be built in the dev container for the nRF54 dev kit. To get into the dev container, go to the Dev Container extension in VS Code and click the “+” at the top to open the drop-down selection. Select “Open Current Folder in Container”, and it will automatically create the dev container and restart VS Code with the terminal running in the container. Run the following command in the container:
west build --build-dir nrf54-hil-quickstart/build --pristine always nrf54-hil-quickstart/app --board nrf54l15dk/nrf54l15/cpuapp --sysbuild
The CI pipeline build can also be run on the host using the eo run zephyr command—more generally eo run <JOB_NAME>—which runs the identified shell script located in the ci/ directory. This file, zephyr.sh, can be modified to suit how a user wishes to run their Zephyr workloads.
Both approaches generate a build folder. The key file for flashing the nRF54 board is build/merged.hex, which was listed as needed for HIL tests in the configuration file .embedops/hil/config.yml.
Running the HIL tests and examining the results
The project is now ready to conduct HIL tests through EmbedOps. HIL tests are triggered by simply running eo hil run on the host machine.
The eo hil run command:
- Finds a device that is online registered under the repository that was initialized on EmbedOps
- Establishes communication with the HIL gateway
- Uploads all the necessary assets for the tests (including the build/merged.hex file)
- Executes the tests defined by the Python files added by the earlier eo add nrf54l15-hil-quickstart command
- Returns the output logs from the gateway
The first time this is run, the gateway needs to install the required Python dependencies, and may take up to 10 minutes to run. However, this is a one-time install, and subsequent tests will be faster.
When the run command finishes, the final number of tests passed can be viewed in the terminal. Running the eo open command on the host will open the nrf54-hil-quickstart project on the EmbedOps platform in a browser. Once there, select “HIL Tests” to see a list of the most recent HIL runs.
By clicking on a particular run, the logs that were output on the terminal during the eo hil run command can be viewed, and any failures, such as connection drops, corrupted packets, or incomplete DFUs, can be identified. The logs also store regression metrics like average DFU duration or success rate across builds so that developers can track the efficiency of their operations.
Conclusion
While unit tests are a great tool for catching logic bugs early, hardware-in-the-loop testing is essential for validating performance when software meets hardware. EmbedOps automates this process while simplifying setup and CI/CD integration to provide embedded teams with a first look at how their devices will perform in the real world. Once tested, any bugs can be fixed to verify correct operation before delivering products to market.
Bluetooth-enabled DFUs on Nordic nRF54 devices provide a high-value HIL test case that is applicable to many commercial products and ensures they can be easily updated in the field without becoming bricked. As such, a combination of unit and HIL tests enables embedded teams to prevent costly recalls and build confidence in producing highly reliable systems when commercializing products.
The next step in the product reliability assurance chain is scanning for security vulnerabilities, and this will be covered in part 3 of this series on automating reliability engineering with Dojo Five EmbedOps. Learn more about easier unit and HIL testing by signing up to EmbedOps today, and for a deeper dive check out EmbedOps Docs for many HIL testing examples using the HIL SDK.